

Flying Curls Jeana
Spring is here, after an 8 year drought on the Central Coast of California, it rained! 23 inches or 127% of normal in Santa Barbara!
Nope the climate is not predictable and won’t be, given the rapid climate change we get to witness, but it does mean green grasses and blooms! Animals and birds are breeding, there’s water flowing, trees fondly swaying under dramatic skies. I just completed my docent training at Arroyo Hondo Preserve on the Gaviota Coast in California. Seems I’m collecting naturalist titles as I completed my California Naturalist Certificate some months ago along with reaching my 2nd year as a volunteer at the Santa Barbara Botanical Gardens.
I am loving our blue sphere. I am remembering the days when I wandered freely and the stars literally guided me. I watched them each night turning around me. It’s different now, I am enculturated by a fancy tourist town in the Mediterranean Climate, more than a little spoiled.
Very soon I will be off, with all my trepidation and longing, all 4 dogs in tow.
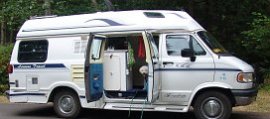
Here’s the list of items I’ve adjusted, repaired or added to my camper… some are for the dogs.
- Replace disintegrated gasket in the furnace and put it all it all back together.
RV Trailer Furnace Burner Access Door Gasket: $14.35
Interesting note I’ve discovered that the built in RV propane furnace is intended to blow cold air to clear the propane in advance, and only if there is enough power will the heat kick on. So the problem with the furnace blowing cold was due to my house battery not holding a full charge.
- Unstick back side window so it opens like the other side to let in the breeze.
This simply took two people, no my dogs cannot be a person when finger dexterity is needed! One person pulling or cranking on each side of the window released it along with some oiling to keep it functioning. - Lengthen the outdoor shower line so that it’s not necessary to create a huge mud puddle right by the door when cleaning the dogs.
Likely one doesn’t need to spend as much as I did on this. I bought a Dura Faucet RV Exterior Quick Connect Spray Faucet with a 15 Foot Coil Hose and Multi-Spray Nozzle: $49.95. I wound up not mounting the faucets. What looked easy in the instructional videos turned out to be too tight and limiting in my LTV outdoor shower box. Instead I unscrew the stock shower head and twist on the 15 foot coil and nozzle as needed!
- Add some reinforcement to the insulation curtains.
I am very much loving the insulated inner curtains I made several years ago. They were made with Fairfield Solarize Liner Fabric. I ought to remake them if I can find where I stored the extra material as they are worn. Likely I will not get to it before I leave as I still can’t sew! I bought some bright orange fabric tape to add to the bottoms of the silver material to hold them together until I remake them. - Fix the leak from the bottom of the Thetford toilet and fix the lack of water for flushing.
I purchased the Thetford 13168 Aqua Magic IV Water Valve kit for $28.73 however this job turned out to be a nightmare with plenty of money thrown at it. I had taken the van to a nearby camp host / RV mechanic. He fixed some things for me which I appreciated. Turns out he was at the RTR so we bonded but then again I didn’t get things fixed at the RTR either. When it came to the toilet it was discovered that the trouble was in the approach waterline. The inline water valve was solidly clogged with mineral deposits. A new in-line shut off valve with the correct fittings could not be found at the local hardware stores, nor the preferred size water lines. An alternative was mavericked together, the original valves, housing, screw on fittings were all destroyed in the process. When done it leaked and there was no longer a shut off valve, this having been replaced by a simple flow through valve, and thereby no way to run any water in my rig without leakage in the bathroom which pooled at the bottom of the toilet and ran down the pedestal.
It you look closely you can see the water droplets leaking from the top connector. That fitting with the clamps on it was cracked in the remake and the person working on it thought he could just clamp it and it would seal, he seemed so certain …. ha-ha-ha-ha-ha NOPE

This was the bulk of the workaround, you can see this is a NO NO.
I contacted Thetford, both by email and phone, I can say they were useless (although they answered both my call and email) and deserve a bit fat rating of ZERO. For several weeks I was on a wild goose chase collecting all kinds of alternative parts which I am currently rounding up for returns. Frans reluctantly took on the job. He should get a big shout out and cheer for his expertise. I located the Thetford water hose extension and fittings (made by Thetford!!!) and the replacement shut off value (a way bigger plastic rendition of the ruined original) from a RV supply house. It’s fixed now, the kit I bought was never really needed but was installed for good measure.

- Replace marine house battery with AGM Deep Cycle 12 Volt 100Ah in preparation for solar.
Another nightmare, at this point not to be completed until LATTER. I’ve discovered one can’t just swap out one type of battery for another. The Multi battery Isolator found under the engine hood must be able to electronically charge an AGM 12V, Deep Cycle battery during driving and the house charging system must also provide the correct type of charge, a trickle charge I believe. AGM batteries are heavy, the 100 Watt is about 60 to 70 pounds, found a great one for about $200 but did not order it, fortunately most of them will likely fit in the battery compartment. At least one of them. If I go with Lithium this will achieve a lighter, smaller, longer lasting stable battery with more power, but at nearly $900 to $1000. My current Marine battery has a home brewed shut off leading to the cabin for my convenience, this would need to be reworked if I proceed in this direction. For the time being as I’m pulling at the bit to get out of town, I’ve decided to toss in another marine battery for house power; on the way home I’ve heard there’s a great shop in Flagstaff AZ to install my solar system: solar panel, charge controller, inverter, battery and associated cables and mounting equipment. (looking at a Renogy Package ) I might find another such shop on my journey. I would be more than happy if this happens! - Troubleshoot Dometic 3-Way refrigerator: there is currently no AC power and therefor likely no 12V power. really sad about this one as I’ve wanted it fixed for some time. I have learned that without fully charged 12volt power there can be no AC power. There is at least a chance a new battery will fix, but I really don’t believe this is the issue. When the ‘frig is switched over to electric the under sink outlet pops open. I was told the board I’ve been searching for (most likley the problem, something in there burnt out,) is not located in the rear of the frig though the access panel as I had thought but is behind the control knobs; in my Dometic that would at the bottom of the unit. I do plan to do a test this weekend by plugging the frig in directly to my house current.When everything’s in place I expect the solar system with improved house battery) to run the frig instead of propane which I use 24/7, for enhanced safety and economy. Would love to get this repaired, my mechanic won’t work on it and well, I’m getting tired of repairs; eventually it will be done.
- Replace blown wall outlet under sink near refrigerator. Self-explanatory.

- Added 2 LED Stick On Battery Powered Tap Lights $12.99. One in the bathroom the other in the overhead cupboard… yep, no lights in there!
- For the DOGS: Bought one package of Clip-On Pet, Dog Collar LED Light – Dog Lights for Collars, Waterproof Safety Lights $12.99 for 6 lights

- Finally gave up and have cut the wires for the CO2 and propane alarms which are directly wired into the walls of the van (they tend to go off for no reason which terrifies my boy Jackson.) Added a portable Kidde Battery Operated Carbon Monoxide Alarm with Digital Display $19.98 <p>

- To repair some cracks in the shower flooring am using EternaBond White Mobile Home RV Rubber Roof Repair Tape. I choose the simplest repair method I thought would work.
- Finally the old annoying frig fan is dead!!!! Yeah! Have replaced it with a Camco Fridge Airator with On/Off Switch: $18.14. I consider the frig fan essential, keeps everything cold with the benefit of keeping ice in the small freezer no matter how hot it is outside.
- New headlight housings, yeah I know you can restore the old ones…. Naught! Get real, they’re old and with the lights on standing in front of the van you can barely see a glimmer. Bought new ones OEM online, my mechanical will install. Interestingly he told me not to bother getting the LED adapters as, if you want to remain legal, they don’t work so well at night.
- I had the 2 side windows tinted with ceramic medium shade by Tint Works in Goleta for $90, he did the front window for me in the past and I’m very happy with the work he does. I had no idea it would make such a difference.
I guess that’s a lot of items, but only the 2 big jobs, the water leak in the bathroom and the new battery (to be delayed) which will be the work horse of the new solar system. Am adding some cosmetic touches and have bought yet another car seat for my problem boy Jackson. Both Olympia and Jackson want to ride in the same location, this journey will likley be filled with the same struggle, but I keep trying! Next stop Bruce’s Auto in Goleta for a trip check.

We replaced our house batteries about last year and looked into buying better batteries. Unfortunately the battery specialist told us going to AGM is not a wise choice if your RV is already fitted for conventional deep cell batteries. He told us having 2 x 6 volt ‘Golf Cart’ style batteries will always be your best buy and will last longer than the AGM types. In our Dodge ‘Get A Way’ van, the house batteries have lasted us about 10 years so this is our 3rd time replacing. Newer RVs go with AGM because it’s a lot less work to manufacture and install in the RVs (no need for air vented battery box to the outside). I’ve got a friend that is interested in lithium batteries but at a price that is x 10 the 6v golf cars ; it’s a touch choice to make. I think we paid $280 for GC2 type 6V while the shop quoted us double for AGM + as you’ve found, $ for new charging regulators. Also it’s interesting to know while the AGM option was double the price, they would not be near the 400AH capacity.
We’re in the process of replacing the aging Dometic RM2200 fridge/freezer. I’m not sure if you’re aware but Dometic N. America discontinued these size fridge/freezers a long time ago and their only replacement is the RM2190 which has NO FREEZER box!!!! You have to go with the larger units if you want a freezer. So we went through the hassles of importing a RM5310 which is a European / Aus / NZ model (we check-in luggage on the airplane from NZ) that has a freezer box and is very near identical in size and spec as the original RM2200. What model did your LT RV have for the fridge?
Here’s what we are installing in our 1995 Dodge Get-A-Way RV: (about $1,100 USD)
https://www.rvworldstore.co.nz/60l-dometic-fridge-freezer
The only drawback is the mains AC power is 240VAC and not N. American 120VAC. A workaround is to use a step up power transformer. As for the propane and 12 volt, it’s the same as any other model.
I will report later on this new fridge/freezer’s performance on this summer’s run. It’s been too long that our RM2200 has lacked performance all these years.
LikeLike
Thank you for the information, good luck with the new frige. Ughhh… why eliminate the freezer, I use mine all the time. What are your travel plans?
I don’t think the golf batteries will fit in the LTVs battery compartment as they are taller and it takes two. I looked at some yesterday that would not. Where do you put yours? I thought of using the rear area under the bed/couch but that space is indispensable for my dogs and access to the rear storage hold. – seriously considering the Lithium will need a new power supply converter and swallowing the price. To get on the road asap likley will go for an inexpensive Interstate at Costco.
LikeLike
We will hit the road to Alaska as usual every year in May & June. The 6V golf cart batteries come in ‘slight’ different sizes. Mainly in different heights as our new ones are slightly less tall than the previous ones. I’ll see to post some photos of the battery box and fridge install when I arrive in 2 weeks time. I believe most of these older B series RV conversions used a battery compartment fitted for x 2 of these golf cart batteries. It may be LT chose a different (lower cost) route by going with the simple single 12V deep cycle battery? Our battery box is under the bed next to the rear wheel well and custom made in a plywood box which has a vented hole through the floor and through the side body).
Which model fridge / freezer is your Dometic fridge?
LikeLike
Hi, Jamie!
Is this the same camper you’ve had all along?
Where are you headed this time? I look forward to your posts from the road.
LikeLike
Hi Cathy!!! Thank you. Yes is the same camper, all my hard work on it has paid off. I wouldn’t mind a newer camper but given the price of them I am even more happy with my 1996 LTV. Am soon headed to the Carolina’s and more!
LikeLike
Hi Jamie, i’m back with photos of our 1995 Dodge Getaway high top RV: First with the batteries
The battery box, factory made under the bed, and inside can be quite dusty because it has a hole in the bottom and a hole in the side wall for proper venting. It has a cover which you use a bungee strap to keep the lid closed. It’s a shame nowadays all the RV makers have gone to much simpler way of installation by use of AGM and Lithium batteries. However, i’m not convinced they last any longer than old fashion golf cart batteries. We paid just over $300 USD in Anchorage AK last yer (for 2 of these 6V deep cycles – rated capacity 235 AH on 20hr rating) total bank capacity of 470 AHrs. These should last us at least another 10 years or until the Dodge RV dies.
We installed a new fridge (see below) and this time, will try to switch to 12VDC operation meaning won’t travel with propane gas running during the long highway runs.
LikeLiked by 1 person
LikeLike
Please excuse my post if it overloads your page with photos – had not realised they would come out in full size (despite using a very old Samsung S3 camera). Anyways, we had some troubles installing the new Dometic fridge and in my previous post I mentioned it’s a special unit we brought over from NZ. It’s VERY unique because it’s the only real option of replacing our old RM2201 fridge/freezer. It appears the new RM5310 is an updated version of the same size made in Germany ; but Dometic N. America doesn’t import them in ; perhaps the N. American market only wants LARGER ones.
So back the problem. The handling of the check-in luggage was very rough and the fridge (in original Dometic box packing) arrived in Canada in a rough state, The corner ends were pushed in with a small dent on the side. Despite the baggage check in counter putting ‘Fragile’ stickers on it… I assume the baggage handlers don’t know how to read. Anyways, it took some time to get the fridge fit right as it was slightly taller by 1″, it required some cutting of the cabinetry – lucky just enough space as we couldn’t cut lower as the grey water vent pipe was at the bottom floor level which we couldn’t go lower, so our only option was to cut above (just under the 2 burner propane stove). Before final fit, I had to buy a special screw adapter for the propane fitting which the inlet connector is on TOP of the fridge. The old Dometic fridge/freezer had all the connections on the bank. The top fitting is European which uses a BSP thread connector. N. American propane pipe fittings use a NTP thread size which is slightly different so a BSP to NTP 1/8″ adaptor was needed. We had a local propane shop fitter to make the connection and rebend the original hose to fit with a shut off valve (perhaps not a requirement by Getaway at the time of RV compliance) but real handy to have a cut off valve. Interestingly, the gas fitter shop told us he was NOT allowed to make the last connection to the fridge because the “legal way” is to go through gas re compliance and certification. He said as a owner user, you can take the risk to do the last connection yourself. Perhaps the gas fitting laws are different in the US than in Canada.
Being all excited, we thought all that was left was to screw the propane connection on and fire up the propane. Well what happened was the burner where the propane flame combust produced a rasply noise and would often “poof” blow itself out. We thought it was an air lock in the lines but it continued to ‘poof’ out continuously (you can’t have this when you need propane operation overnight). So we spent the whole day looking and looking. It turned out that the thermalcouple probe that is above the burner flame had a bend which is normal at factory. But looking closely at the burner slit where the gas comes out, 2 slits were indented, and for sure, caused by over bending the thermalcouple probe too far which pushed against the burner (quite certain factory worker was too hard with the plyers) so when they over bent, they simply… bent the thermalcouple probe mount back to proper position and never thought to just fix the indented burner orfice. However the dent in the burner ofice caused the propane gas not to flow correctly (or freely out) which created a ‘fluttering’ sound that was easy to blow out. It was VERY difficult to lift the slits back up evenly in the orfice so they were all aligned. Once this was fixed, the gas flame gave a normal shape without the loud fluttering sound.
I’m hoping this post would be valuable information for those owning older B-series RV conversions like our Dodge van. Because a lot them came with the small size Dometic fridge (ie RM2200, RM2201, RM2202, etc). Currently Dometic USA/Canada cross reference chart states replacement to use their RM2193 which is slightly smaller in size, but has NO FREEZER BOX!!!
https://imgur.com/Okqz8H4
https://imgur.com/bmjD3Kn
You can see the vent grills are old style. Dometic installation manual says we should be using their newer vent grills but I see no reason how the older style vents can not work.
https://imgur.com/rRooj1R
https://imgur.com/Nuaokxt
Unlike our older RM2201, the control panel is easy access inside. The meter on the right tells there’s propane burning. Push button ignition.
https://imgur.com/60Us7CC
LikeLiked by 1 person
Just thought to let you know that i’ve done some more electrical work on our Dodge RV. Originally GetAway (RV conversion maker) used an RV Solenoid to isolate between the main front battery & the house battery. Over the years we’ve had to replace it 3 times. After replacing the house batteries last year I discovered there was too much voltage drop going to the house batteries – at times barely 13 volts despite having very large 4 awg size wires over 18 feet long. Why is this a problem? Because if you don’t get high enough voltage, your batteries will never get fully charged. This is the key problem with most batteries and i’m certain your AGM too will suffer if you don’t charge them properly. I realise that going the simple solenoid way isn’t great as the contacts inside over time will corrode and builds up resistance. I’ve confirmed when touching the wires around the solenoid and they go very hot! Solenoid below if you don’t know what they look like:
To fix this problem I installed this: (yes it’s a very expensive product)
https://www.ctek.com/products/vehicle/d250sa
It features a solar PV input so it knows when to charge your battery. I don’t believe we will ever use that features as the main alternator supply should be sufficient. But in your case, you do look for having a solar panel option, this CTEK unit will do the job perfectly.
When you consider the cost of a proper battery isolator / solenoid repairs, a solar panel input management sytem, and proper charging voltage to the house battery (if you were to buy each of these separately), the D250SA is a fair price.
LikeLiked by 1 person